Saturday, August 30, 2014

Perfect Pattern Parcel #4

I'm so excited to be part of the Perfect Pattern Parcel #4 tour!

What is Perfect Pattern Parcel you ask?
About Pattern Parcel:  Here at Perfect Pattern Parcel, we believe in supporting independent pattern designers. It’s our opinion that indie patterns are just, well, better than big box patterns, and we’re pretty sure our customers think so too. So, we allow customers to show their support in naming their own price for each Parcel.  We also encourage customers to allocate part of their Parcel price to the charity Donorschoose.org in order to help classrooms in need. Pattern Parcel donates all profits after expenses from Parcel sales to the charity as well. Together we've raised $9,800 towards eliminating educational inequality.

Pattern Parcel #4 includes:
Maxwell Top by Shwin Designs
Zippy Jacket by Blank Slate Patterns
Schoolboy Vest by Sew Much Ado
Small Fry Jeans by Titchy Threads
Jet Pack Bag by Betz White

Pattern Parcel #4

That's right, this parcel is all about the boys, and I love sewing for my boys! In fact, these patterns are so fantastic I already owned quite a few of them and have sewn with them in the past.  I've taken a few past creations and added a few new items to create this preppy look for my boys, because who does love getting fancy every now and then.  But these patterns are so versatile they're easy to dress up or down. 

*Disclaimer: I was given these patterns to review in exchange for participation in the tour*

First up: the small fry skinnies by Titchy Threads.  This is my most favorite PDF pattern I have ever owned!  Seriously, it is that amazing.  The fantastic details and superb instructions combine to give you an amazing pair of pants that nobody will ever guess is homemade.  And the fit is perfection!  The perfect pair of tailored jeans without being over the top skinny. 


For this pair I used a lighter weight twill and left off the back pockets for a dressier type feel.  Perfect for both church or a day at the park.  This pattern is a staple for boy (or girl) sewing. 

Next: I used the Maxwell Top by Shwin Designs to create a classic white button up shirt.  This is a fun shirt with unique details to create a fun and stylish boys button up shirt.  For mine I left off the button tab and extended the sleeves to be able to cuff them and love the results.


And last but not least, The Schoolboy Vest by Sew Much Ado.  This was my first pattern from Sew Much Ado, and boy have I been missing out.  The instructions are clear and concise and the pattern is amazing. 
The results are so professional, my husband didn't believe I actually made them!


I decided to make matching vests for my boys and couldn't be more pleased with the results.  The pattern includes and option for real or faux welt pockets (I went with faux) and can even be made completely reversible if needed.  And as you can see in the picture below, the inside is just as perfect as the outside.


But my favorite feature: the vest ties in back!  Seriously, how cute are they?!


One last thing!  I haven't told you yet about the awesome bonus pattern!

Choose a price of $26 or greater for Parcel #4 and you will automatically also be sent the Bonus Pattern! The Bonus Pattern for this Parcel is Knight Hoodie by Charming Doodle. This pattern is a unique and fun spin on the traditional hoodie. Thorough instructions and pictures help you create an amazing and memorable hoodie that will inspire creativity in your little one.

Pattern Parcel #4

Have I convinced you yet that you need these patterns?! Be sure to snatch these up before this great package is gone! 

Buy Pattern Parcel #4

Now go get sewing for those little boys in your life!


And be sure to check out all these other blogs sewing up some boy fun!


Parcel #4 Inspiration Tour Schedule:

Friday, August 22 casa crafty || Lulu & Celeste || Keep Calm and Carrion

Saturday, August 23 Max California || Amanda Rose

Sunday, August 24 little betty sews

Monday, August 25 Kadiddlehopper || Radiant Home Studio

Tuesday, August 26 La Pantigana || Boy, Oh Boy, Oh Boy Crafts || Friends Stitched Together

Wednesday, August 27 Make It Perfect || Modern Handmade || GYCT Designs

Thursday, August 28 Needle and Ted || Mae & K || Mimi's Mom

Friday, August 29 Pienkel || Once Upon a Sewing Machine || Friends Stitched Together

Saturday, August 30 FABulous Home Sewn || Gray Skies || The Crazy Tailor

Sunday, August 31 Nine Stitches || Max California || Oliver's Fancy || Friends Stitched Together

Monday, September 1 a happy stitch || lady and the gents || Our Family Four || Swoodson Says

Tuesday, September 2 verypurpleperson || Things for Boys || The Crazy Tailor

Wednesday, September 3 Our Family Four || Rebekah Sews || a happy stitch

Thursday, September 4 Sew a Straight Line || la inglesita || Made by Sara || Knot Sew Normal

Friday, September 5 Knot Sew Normal || Gracious Threads || Sofilantjes || Max California

Friday, May 23, 2014

Freezer Paper Stencil Round-up

The blog Gracious Threads is currently hosting a series called Embellish is for Boys, and seeing how I sew mainly for boys this is right up my alley!  This week is all about freezer paper stenciling, which I've done more than my fair share of.  But I didn't realize quite how often I use this method until I started looking through all my old photos.  This is definitely one of my go-to ways to create fun, unique designs for my boys.  Here are just a few of the ways I've used freezer paper stenciling: 

Cool and hip mustache tee: check!


For the superhero lover, no problem!


 Personalization... easy squeezy!


I even stenciled a Batman belt!
 

I've used this method on quite a few birthday shirts for my boys, this is the most recent one. 

Duck, duck, goose!

And last but not least a one-of-a-kind tee for a visit to the Magic Kingdom!


I seriously love freezer paper stenciling!!

Saturday, May 10, 2014

Kids' Choice

One of my favorite blogs is hosting a series called Kids' Choice.  Basically you give your kids total design control to create whatever it is that they want.  Shortly after this was announced I was wandering around Joann's with the boys in tow and we stumbled upon a bright and busy race car print.  Definitely not my first choice for fabric, but Tot was smitten.  And then I recalled this series and decided I guess I can figure out something to do with it. 


After a very short brainstorming session, we now have a snazzy new pair of shorts!  He only wanted shorts. Because shorts with race cars make you run super fast... don't you know!

I used Peek-a-boo pattern shops Costal Craze Baggies to create the perfect lightweight summer short.


  The knit waistband is a must for my boy who only likes "soft clothes."  He didn't want a shirt, just shorts. But I went ahead and made a black and white raglan shirt with racing flags on them, and he absolutely hated it (go figure)!  So he picked his most favorite rocket shirt to pair it with, and thankfully it matches.  Not homemade, but what's the point in kids choice if he hates half the outfit!


Conclusion:  I've got one happy kid on my hands!  I definitely think we'll be doing this more often, in fact he already has a few more ideas he wants me to create.  Hopefully I can keep up!

Tuesday, January 14, 2014

PRP Week 1: Winter Blues

In case you haven't noticed (which you probably hadn't because who reads this blog anyway) I'm a terrible blogger!  I would so much rather be sewing than clunking around on my computer trying to put up a blog post.  But there is one thing that never fails to drag my technologically challenged self out of my sewing room and onto this here screen, and that is Project Run and Play.  I don't quite understand why I love it so much, but I do!  It challenges me to sew things I wouldn't have otherwise.  And I love a good deadline, it's the only way I actually accomplish stuff around here.

So without further ado, I present my Winter Wonderland inspired look:  Winter Blues


Don't let my title fool you, I'm actually a big fan of winter!  We look forward every year to our annual snowmobiling trip to the cabin, complete with 8+ feet of snow and subzero temperatures!  Over the years I've learned how to appropriately dress for such occasions, but getting the kids to cooperate can prove to be quite the challenge.  Comfort is key and layering is essential, you never know how cold (or hot) they will be. 


I've created quite a few different pieces to create the perfect winter wonderland look. The outer layer features a super soft and comfortable sweatshirt, up-cycled from an old men's sweatshirt.  The cowl neck gives the sweatshirt a slightly preppier feel and helps keep his little neck warm.  It's comfortable yet stylish, without restricting any movement.

 The pants is probably one of the most professional looking garments I've ever sewn. I was fortunate enough to test the newly released Small Fry Skinny Jeans from Titchy Threads, and I am so in love with this pattern!  The fit is exactly what I want in a skinny jeans, not too slim but not too baggy. I made these pants in a wool/polyester blend suiting that is slightly thicker than your average suiting material.  It's the perfect weight for these pants.  Comfortable and stylish with the slim fit, yet thin enough to allow for extra layers underneath.  The pants feature adjustable waistband, flat felled seams on almost all seams, patch pockets, half fly, and the cutest belt loops you've ever seen!  Complete with contrast waistband facing to tie into the whole "blue" theme. 


As we shed the outer layer we come to my most favorite part of the look, the ever important base layer.  Comfort and flexibility are key, and I think I nailed it on these pieces.  Made from upcycled knit T-shirts, this long sleeved shirt and long john's are essential pieces in any little guys winter wardrobe.  Both are fitted enough to fit nicely under whatever else he may be wearing, but thanks to the lovely stretch in knit not restrictive in the least.  Since both garments were upcycled from existing T-shirts, I had to get creative in my cutting.  It's hard to tell in these pictures, but both the sleeves and legs are made up of three separate pieces, an element I think added some fun detail to an otherwise basic item.  


I spiced up the long john's with fun little lightning bolts stamped all over.  I was really worried how these would turn out, but I LOVE them... by far my most favorite piece in the look!  They also feature a fully functioning fly for the little guy.    


And when not in use as base layers they are perfect for lounging around the house reading books.  


That concludes my Winter Blues look, congrats if you made it to the end of the post! Here's a few outtakes for you to enjoy....


 Other details if you're interested:
Sweatshirt: Pattern, Varsity Cowl Neck by Peek a Boo Patterns.  Fabric, upcycled mens sweatshirt.
Pants: Pattern, Small Fry Skinny Jeans by Titchy Threads. Fabric, wool blend suiting from Joann's.
Long Sleeved Top: Pattern, Ottobre 6/2013.  Fabric, upcycled knit T-shirts.
Long John's: Pattern, also Ottobre 6/2013.  Fabric, upcycled knit T-shirts. 

Wednesday, November 20, 2013

Hangout Hoodie FLIP!!

I've been thoroughly enjoying the Flip this Pattern series over on Frances Suzanne.  I have no yet participated, but when I saw the Hangout Hoodie was coming up from one of my most favorite pattern designers, I just couldn't resist this go round!  I very rarely stick to a pattern 100%, so this was right up my alley.  

So I present to you my flipped creation: 


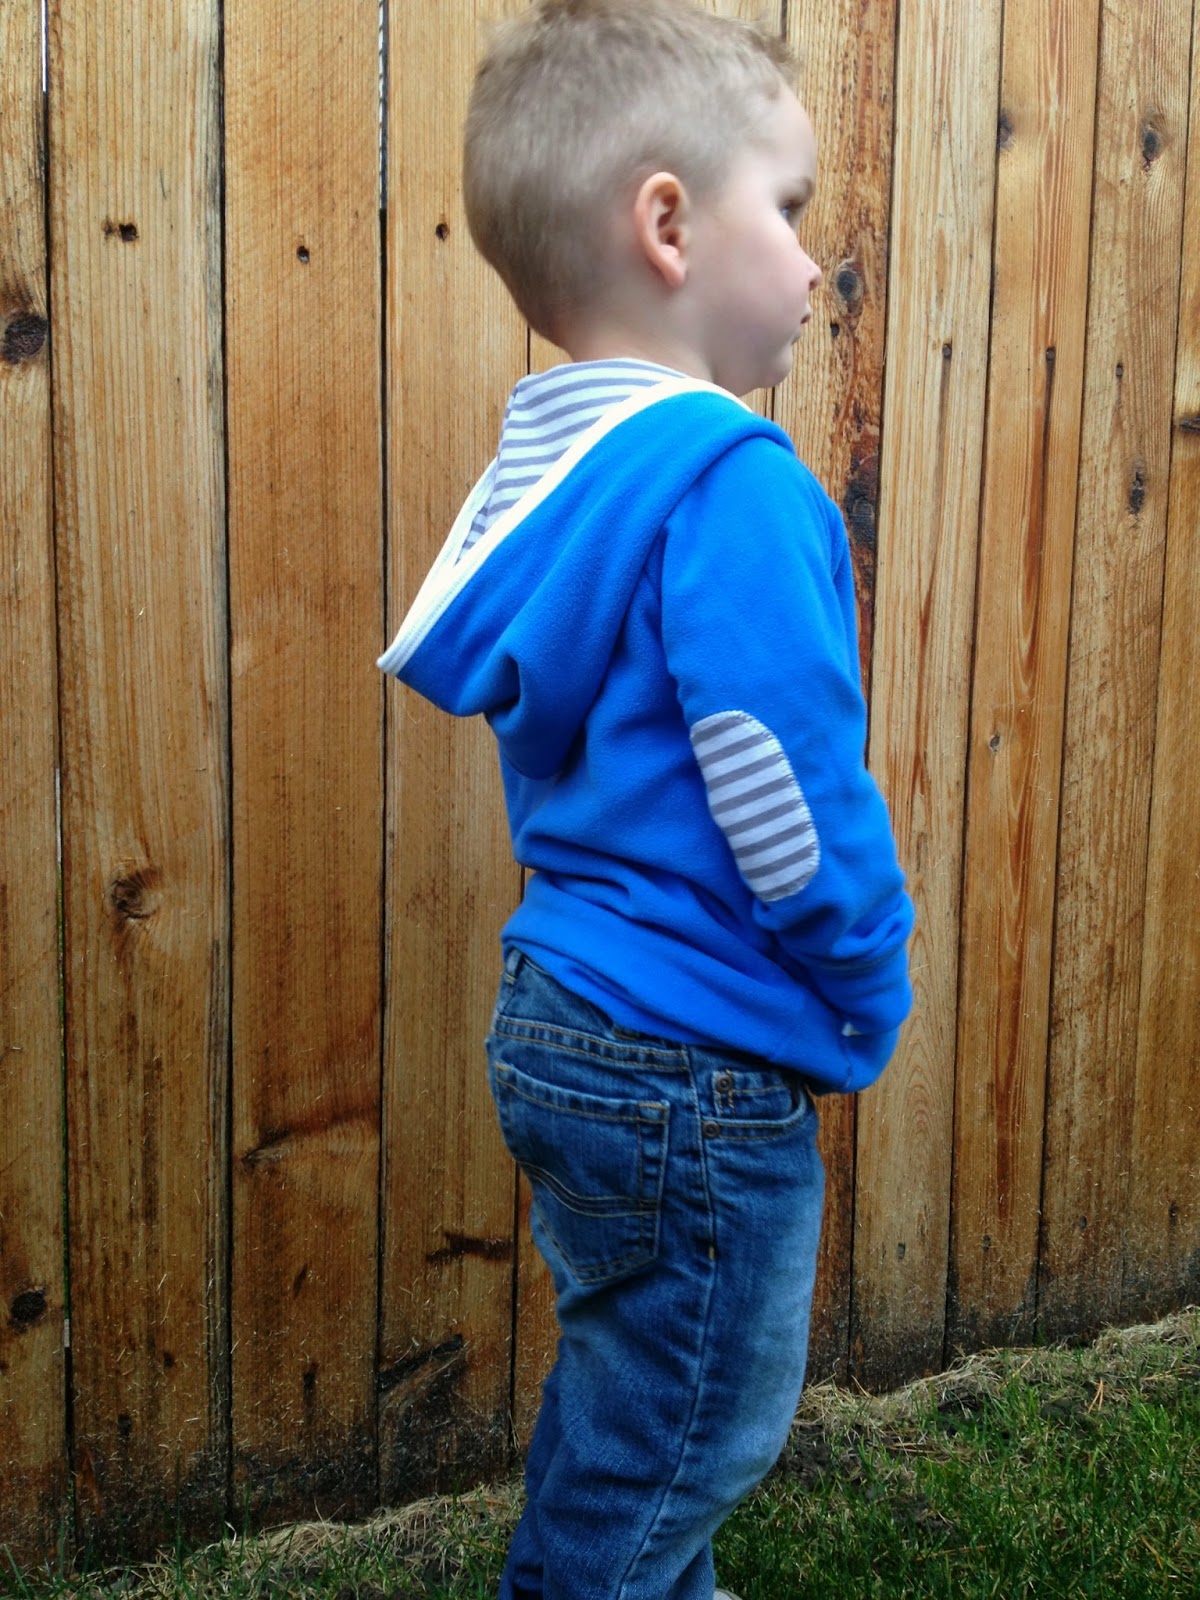
 It's pretty much just a hoodie, but with a few (I think) awesome modifications.  The most obvious, a zipper!  I love everything about the hangout hoodie, except for the placket.  I just wasn't a fan of the half-open half-closed can't-decide-what-it-wants-to-be look.  There's absolutely nothing wrong with it, just not my style.  But I loved the contrast placket and how it extended into binding for the hood.  I tried to preserve that as best I could, just adding a zipper to keep things together. 


Other modification:
-I went two sizes up so I could use microfllece for the body to give it more of a sweatshirt feel. 
-I made my hood much bigger/deeper.  I like a hood with good coverage!
-Lined the hood so I could have a fun accent.
-Added a lined kangaroo pocket based off of a sweatshirt he already had.
-Elbow patches! Because who doesn't love a good elbow patch!
-Fun topstitching where the sleeves and cuffs meet to look like a coverstitch. 


 Overall, I am so pleased with how this came out!! It's seriously one of my most favorite things I have ever sewn!


Flip This Pattern

Wednesday, October 2, 2013

Halloween Inspiration

I have yet to do any Halloween sewing/crafting this year but it's definitely on my to do list!  I've been organizing all my photos from the past two years and came across these.  They got me excited to get my rear in gear and get going on this year's Halloween costumes.  And I better start soon, I'm really nervous if I can pull it off this year! 

Two Halloweens ago I got my hands on this adorable black ghost fabric (Riley Blake I believe).  They immediately became ghost jammies for my oldest guy, and I just loved them.  We wore them well past Halloween and I didn't even care.  Shortly after Halloween I stumbled across a website with all Halloween fabrics on clearance.  That's when I snagged up the orange ghost print, and one of the few times I knew EXACTLY what I would be doing that fabric!

Fast forward one year later... the black ghost pants now fit brother perfectly and Tot got a brand new pair in orange.  I don't know why, but these ghosts just make me so happy!  Obviously mom-forced photos don't make my kids happy but, what can you do?

But that was last year.  This year I don't plan on making any Halloween jammies.  I've got my hands full with costume making.  Also, I haven't come across any Halloween fabric that I love quite as much as these cute little ghosts. 


 I also tried my hand at making costumes last year.  I only made one out of two, but I'm still pretty darn proud of that one!  It's a fox!  And his brother is a racoon (thank you Costco!).  The jacket portion of the costume is a mash-up of about four different patterns.  Not my best work, but I still loved it!  And the pants are from the free Kid's Pants pattern over on Made. 


 Complete with a cute little tail sticking out!


Oh I love that little fox!  Time to stop reminiscing and get moving on this year!  Fingers crossed they will be done before Halloween, and meet picky four-year-old expectations! 


Wednesday, September 25, 2013

PRP: Lil' Lumberjack

Here we are, week 3!  I was so excited for this week.  I have had this fabric for almost a year now, with the intentions to make this exact shirt but then never got around to it.  So thank you Project Run and Play for motivating me to finally finish a project! 

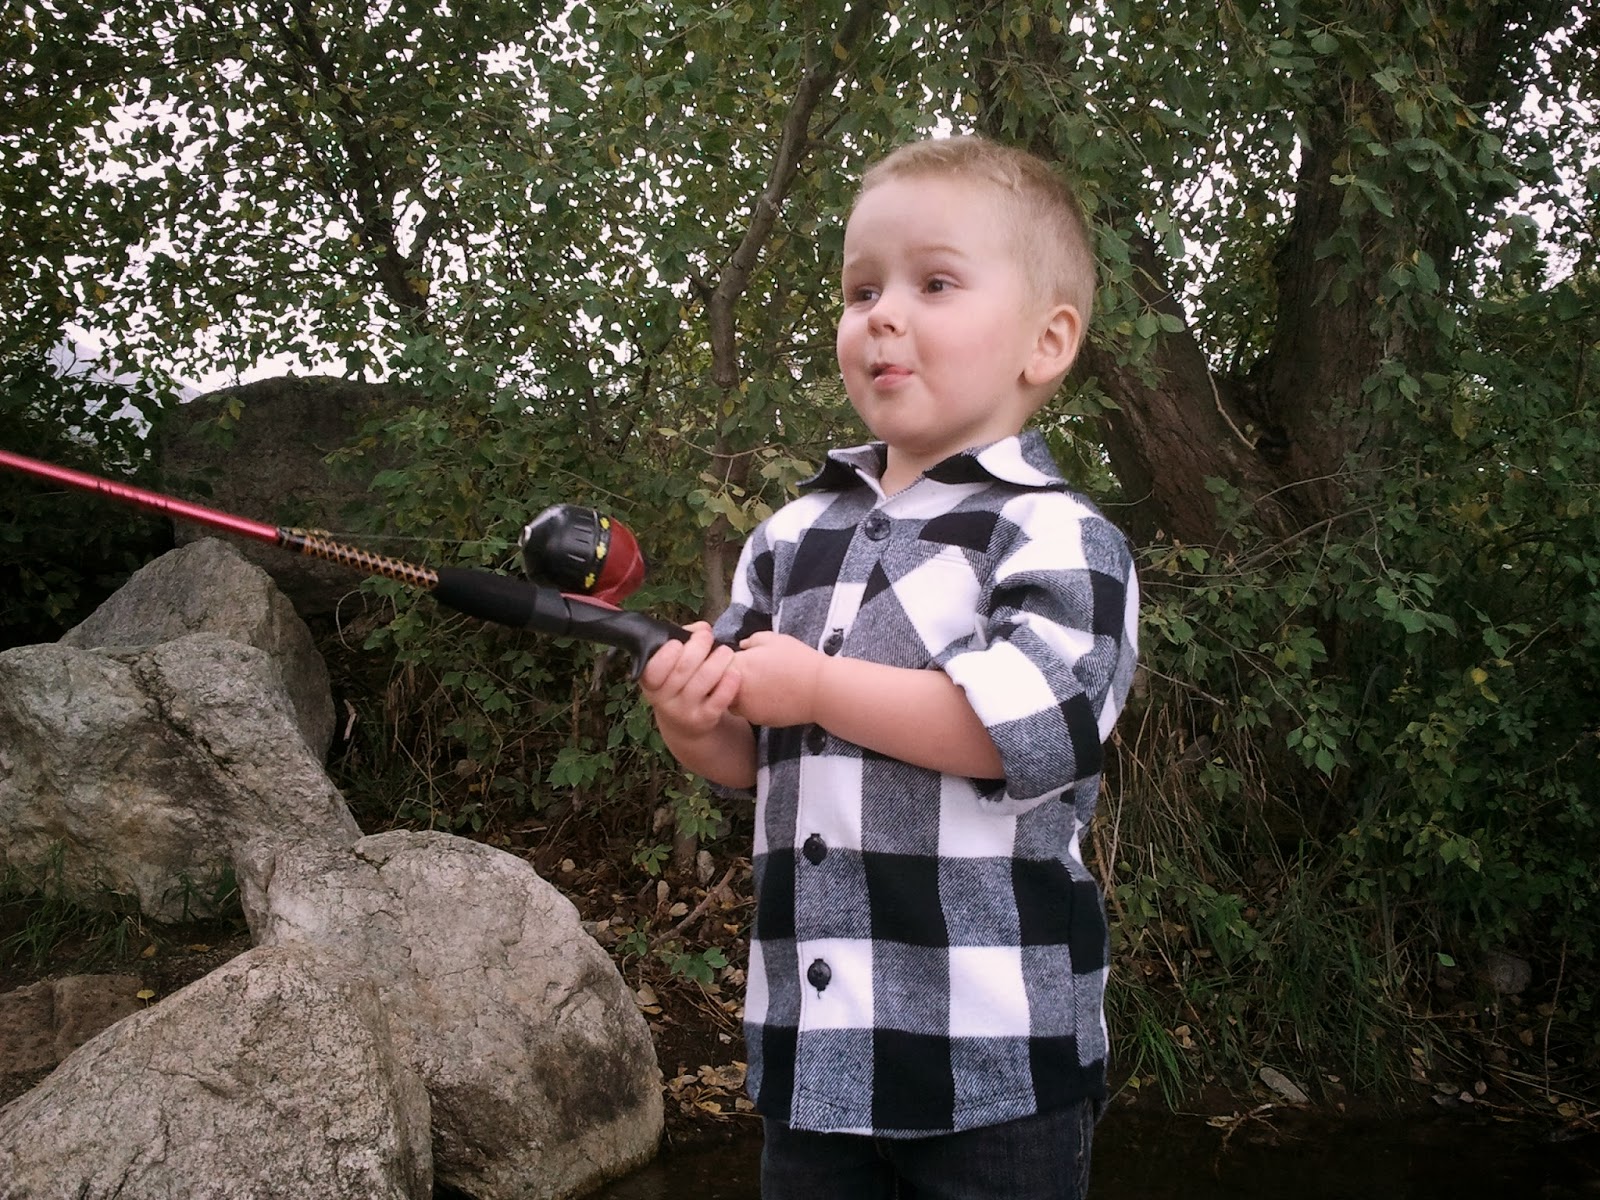
 I realize I haven't done anything earth-shattering with my plaid design, but I think it suits my little guy perfectly.  And I just can't seem to get enough of him in his awesome new shirt!
 

It is truly amazing that this project got finished.  I added a little wiggle room to  my self-drafted pattern, and somewhere along the line I really messed up the front overlap.  Of course I didn't realize this until the very last step of attaching the collar.  I have never done so much seam ripping on a single project, and had it not been for the looming deadline of PRP, I know I would have tossed it aside never to be touched again.

However I persevered, and wouldn't you know it... I ended up with a shirt I absolutely love!

 That's his serious fishing face

I used a nice, sturdy flannel for the shirt.  Perfect for layering for the chilly fall weather coming up.  The perfect shirt to wear fishing or hiking with his Dad. 


The back yoke and pocket are cut on the bias.  And my most favorite detail... the  sleeve cuffs!  

The sleeve cuffs/placket are made out of solid black twill, as well as the under collar and the under collar stand.  I thought it would be a fun, modern touch on an otherwise rugged shirt.

And can I just say how proud I am of those sleeve cuffs!  I've probably made 4 button-up shirts before this, and I have always cheated on the sleeves.  I ALWAYS cuff the sleeves, so I would just hem them like you would a short sleeved shirt since I knew no one would ever see it but me.  So happy to have finally conquered that sewing technique!


And a few more details:
Pattern:  Mostly self drafted, but I used the sleeves off the Peek-a-Boo Patterns Classic Oxford Shirt
Fabric:  Black twill from Joanns.  Buffalo check from Joanns.

Off to sew like crazy for next week!


Thursday, September 12, 2013

PRP: Starburst and Stripes Tee

 My first post.. how exciting!! I've been a long time follower of Project Run and Play, and have finally decided to try out a few sew-alongs.

When I read the themes for this season I sort-of dismissed this week.  Don't get me wrong, I love candy.  But when I think of candy I think of bright, crazy, over-the-top and in-your-face colors! And that is so far from my personal aesthetic I wasn't even going to try.

But then a Mini Boden catalog arrived in the mail and while looking through it with my son he found a shirt he LOVED.  This shirt to be exact.   And of course the first thought in my head was "I can totally make that!"  Gears started turning in my head about how I could incorporate this into PRP and, while, here we are!

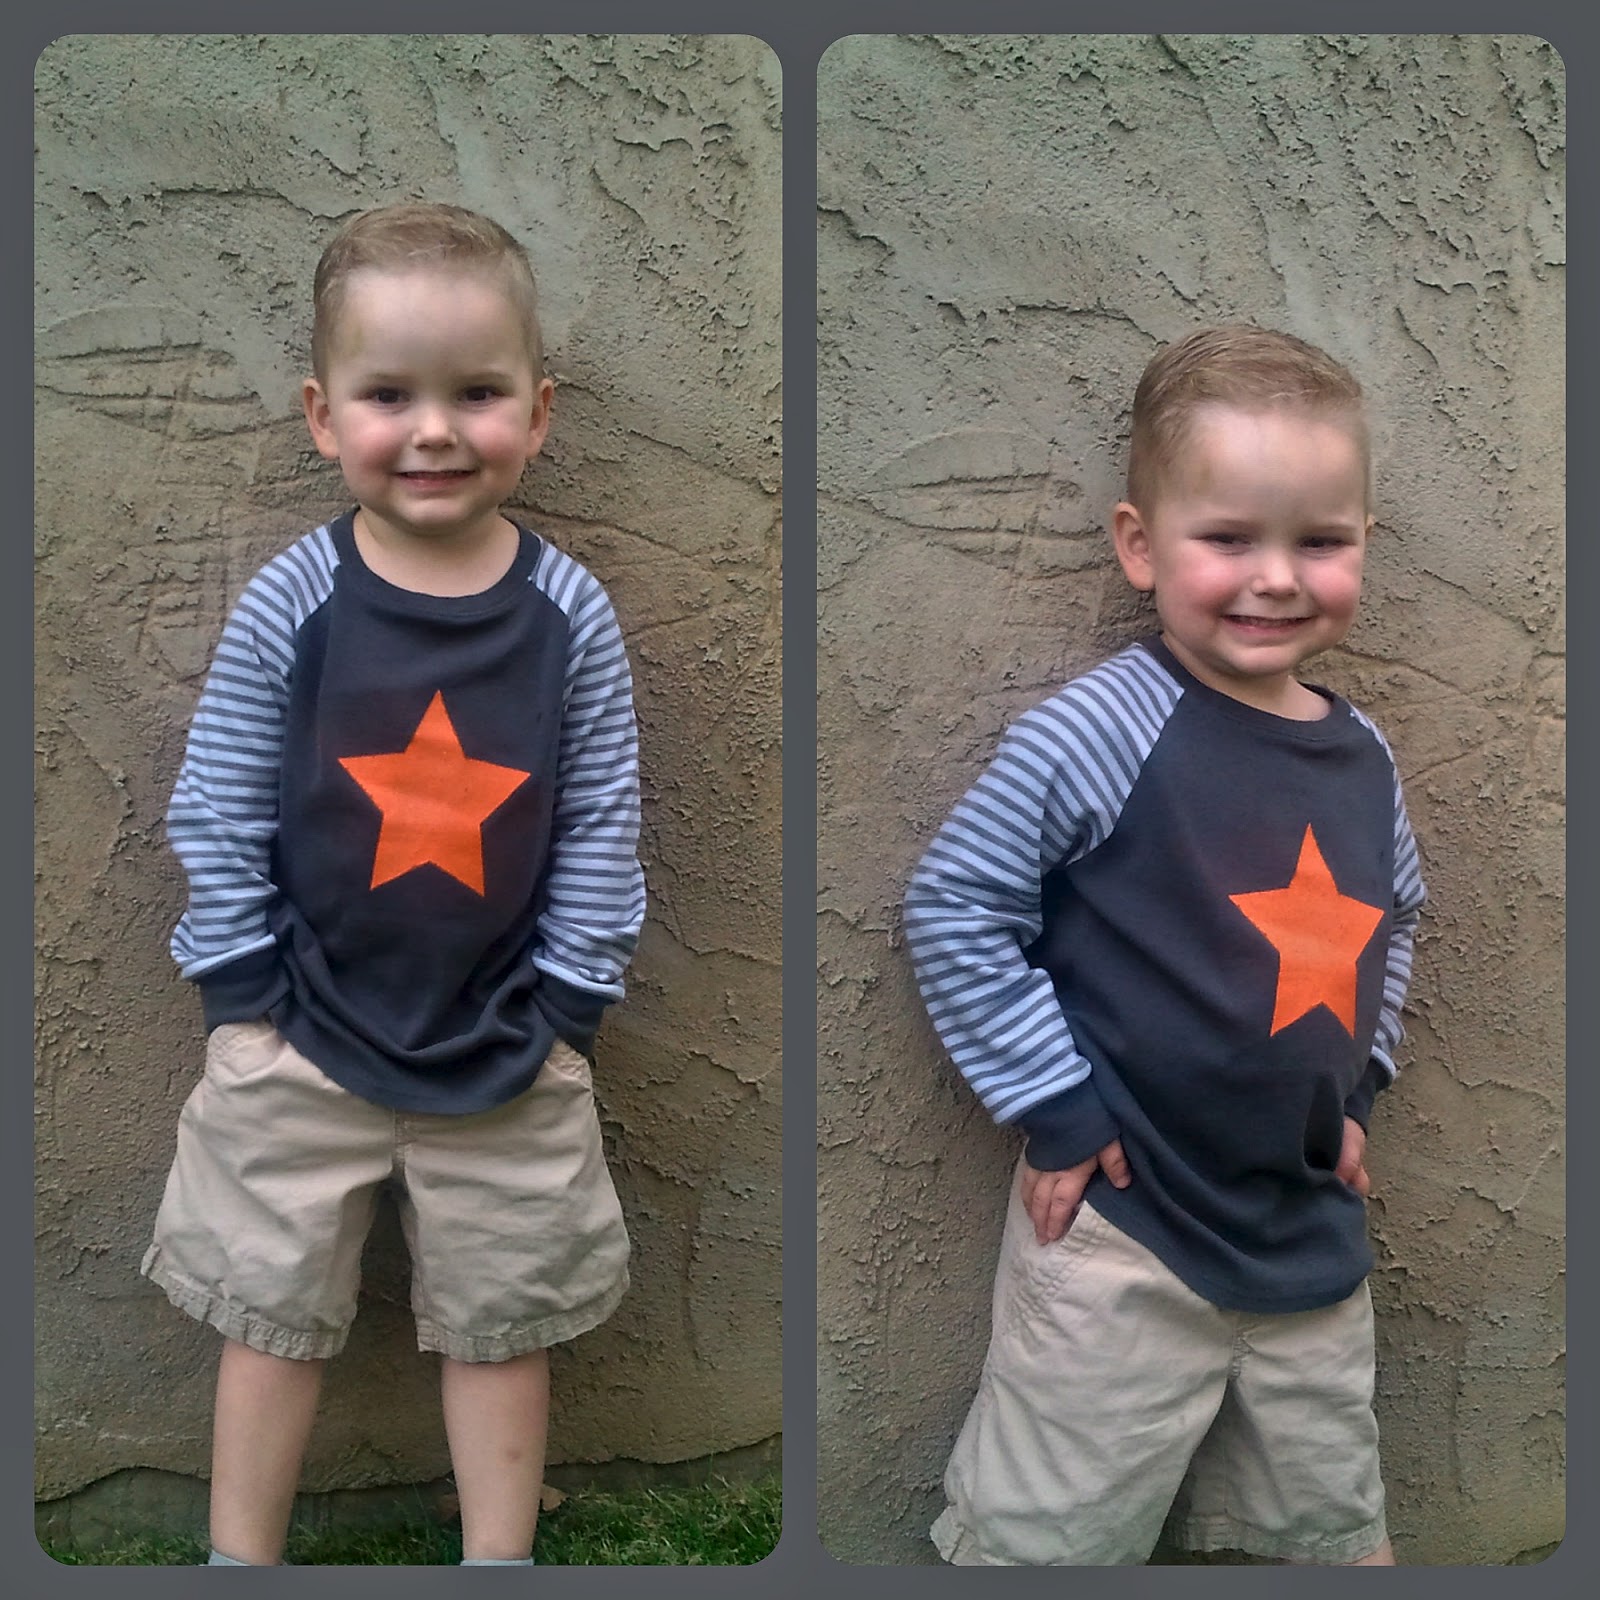
So here it is:  our starburst and stripes tee


A nice basic raglan long sleeved shirt with a bright bold star to reference his new favorite candy: starburst!  I'm in love with how the shirt turned out.  Thankfully he loves it to, so we'll get lots of use out of it this winter.  


A few more details if you're interested:
Fabric:  The charcoal is an old tee of mine.  The striped is interlock from Joanns.
Star:  Acrylic paint mixed with textile medium, freezer paper stenciled on.
 
Excuse the lack of pictures.  I snapped these quickly on the way out the door to preschool with intentions to take close-ups later on.  While, he came home from preschool  a complete mess so that wasn't going to happen.  But come back next week, I've got something totally awesome in the works for plaid week, can't wait!